
Hey there pretty people!
How’s your week going? Mine is going…the first week back from vacay is always tough and I decided to tackle a million house projects this week, so I am tireddddddd, but excited to be home and I am having fun with all my projects!
The project that I am going to share with you today is a favorite of mine.
Here is the back story…Reagan has been wanting a “tea party table” for her room. My original plan was to surprise her on her birthday with one. But, I couldn’t find anything that I just loved, so I was planning to DIY one. Since, we were going to be out of town for her birthday, I decided to tackle the project when we got home…I didn’t plan to do it immediately after we got home, but, when I have a bunch of ideas in my head, I don’t sleep. I just think about and get excited about all of my ideas. This idea popped into my head around 2:30am, Saturday morning. So, Saturday, I decided to make a trip to Ikea. I’m pretty sure that everyone else in Houston was there that day! Anywho, I had come up with the perfect way to fancy up an Ikea kids table and chairs and I needed to start it immediately. As always, I never know how my ideas will turn out, but this one seemed like it should work pretty well and it did!
Ikea has lots of children’s chairs and tables to choose from and the pricing is right. I went with the Sundvik chairs (we’ve actually had this table/chairs before and gave it away because I didn’t think we needed it anymore! ha!) and a Kritter table. They were out of the Sundvik tables and I have no patience to wait, so I went with a smaller table. These two sets mix and match perfectly and in the end, I am glad I went with a smaller table because it fits perfectly in her little space.
I wanted to add padding to the chairs to make them more comfy and add fabric to the chairs to give them a more customized look. I absolutely love how mine turned out and I couldn’t wait to share them with you!
Side note: The fabric I chose for Reagan’s chairs is one of the fabrics that is in her new room. I am in love with the fabric and wanted to use it as much as possible, so adding it to the chairs was a perfect way to add more of it. Her room will be finished so soon and I can’t wait to share the whole thing with you! It’s been a long time coming and I love seeing it all come together!
Ready to get started?!
The Necessities:
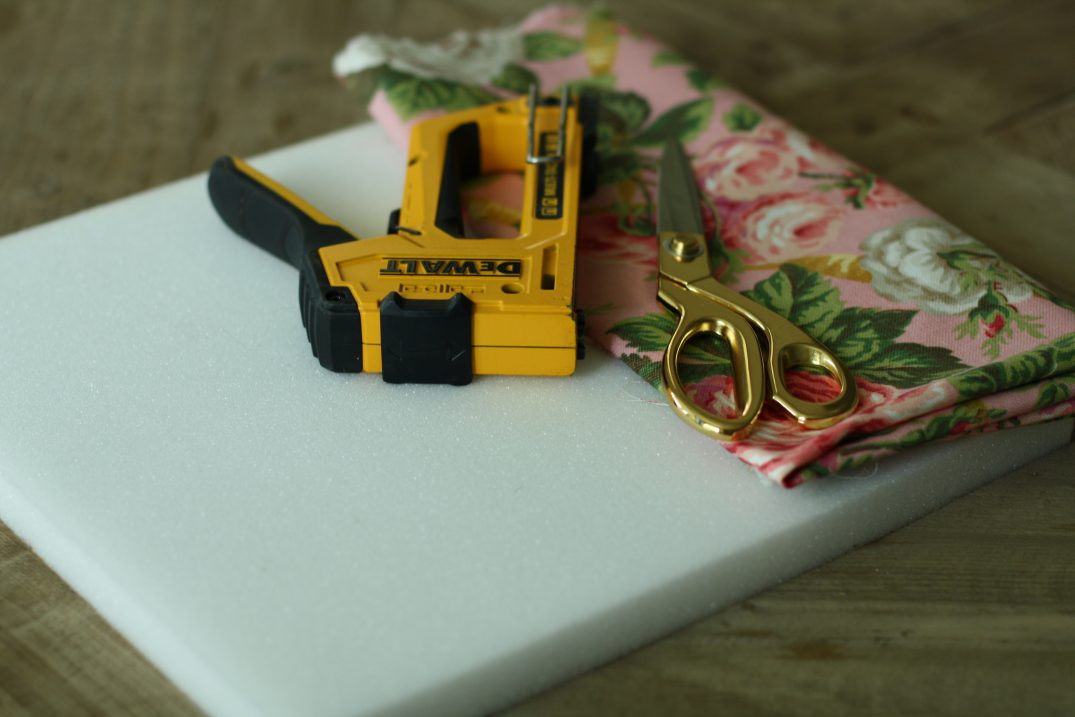
Chairs (build the chairs per the directions and stop before adding the seat piece)
Fabric
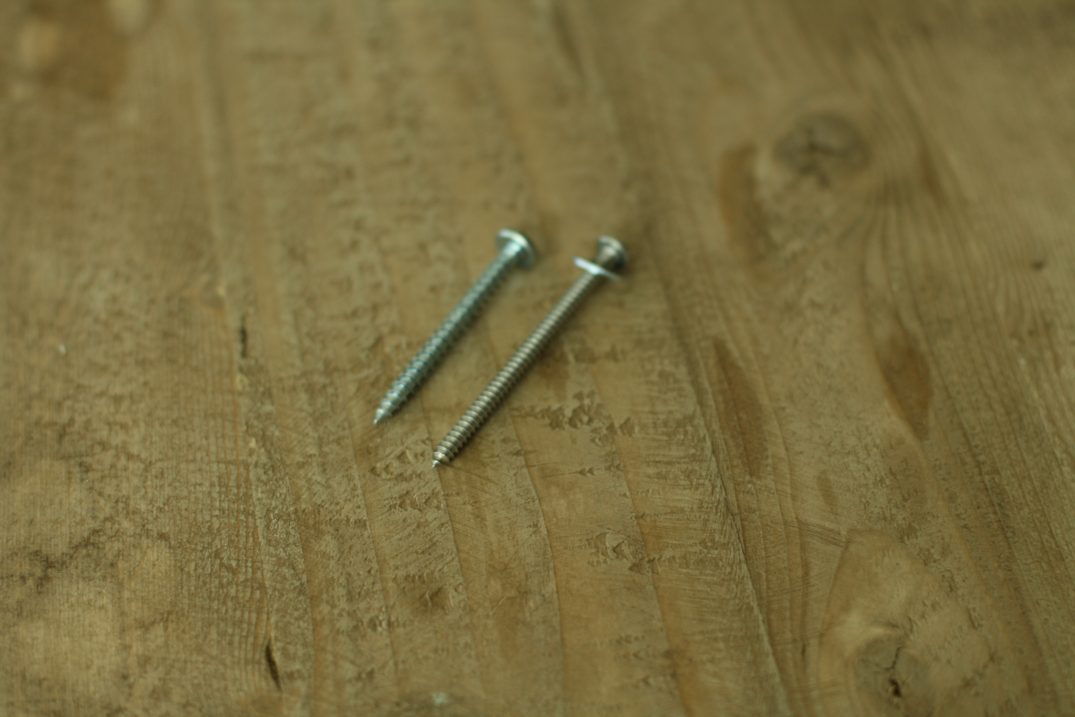
4 (2 1/2 inch) Screws/Washers (screws should be 1/2 inch longer than the screws the chair comes with. You can purchase at your local hardware store)
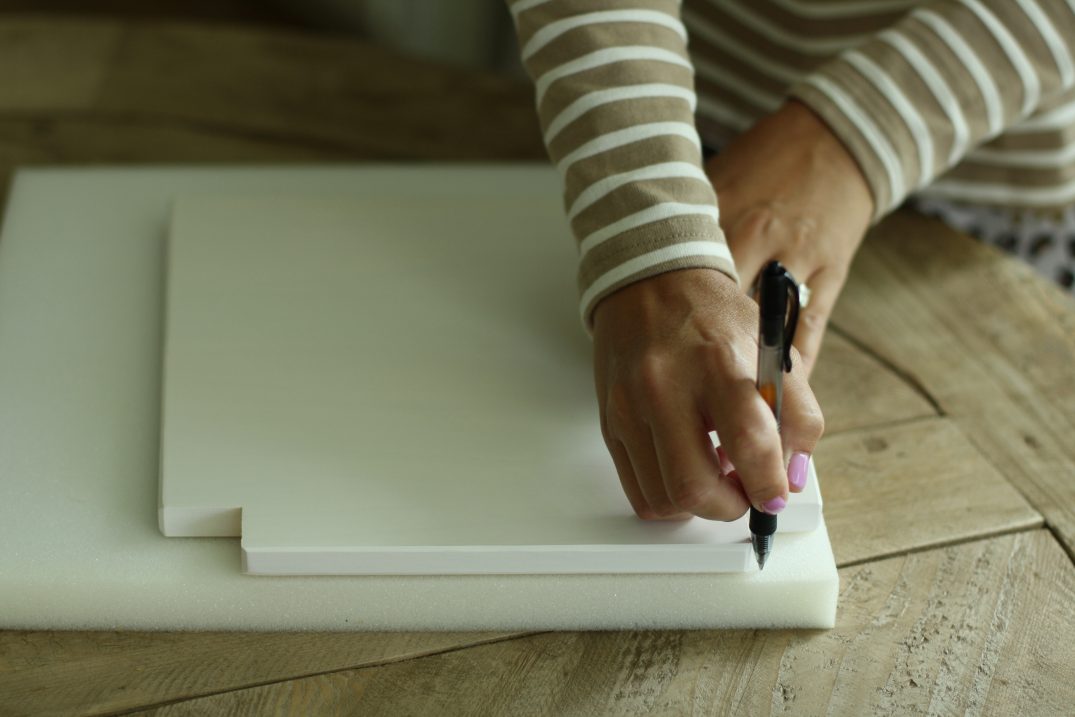 Start off tracing the bottom part of the chair on the foam board.
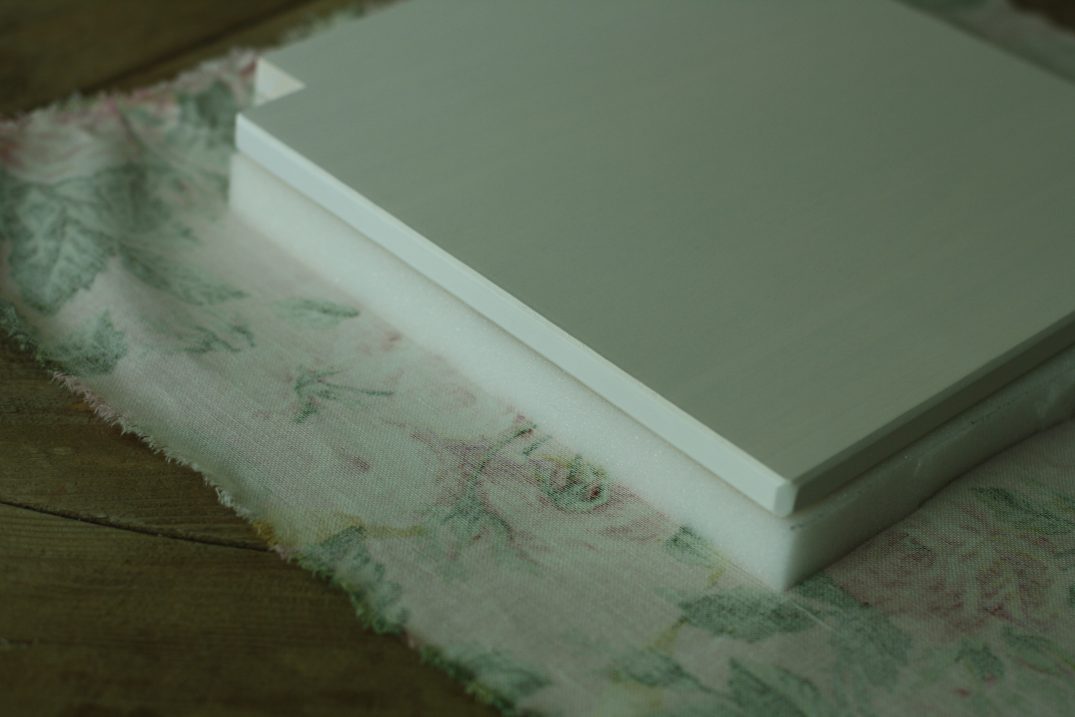
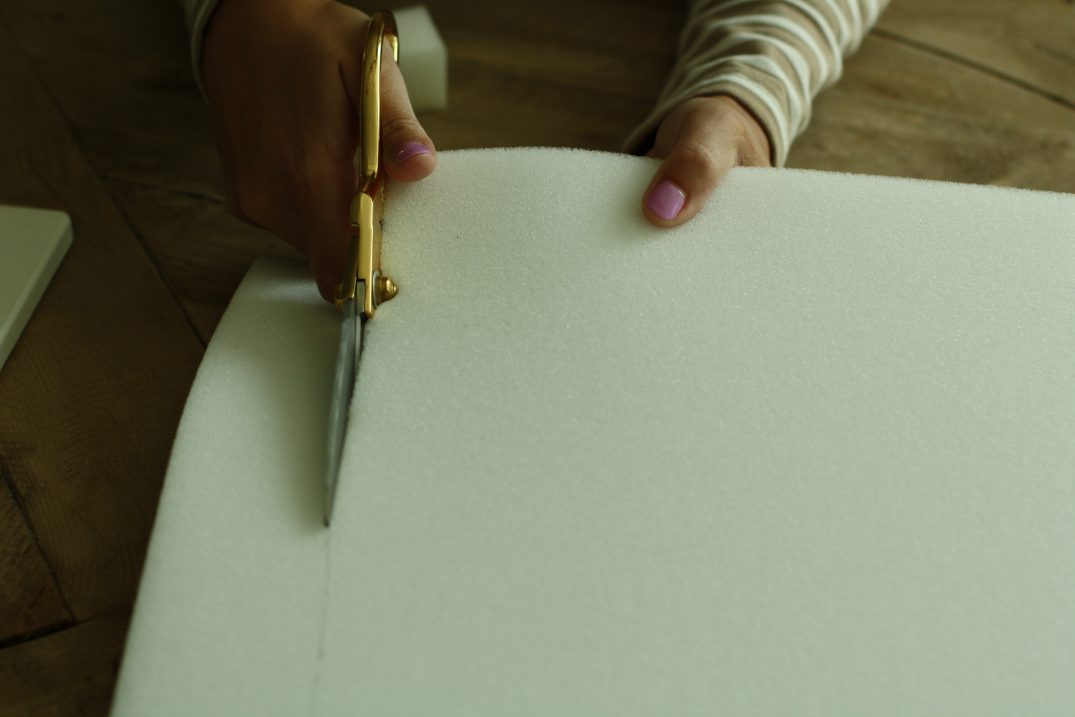 Then, cut out your piece of foam. It doesn’t need to be perfect of course, but you want to be sure that you have enough foam to cover the whole top of the seat piece.
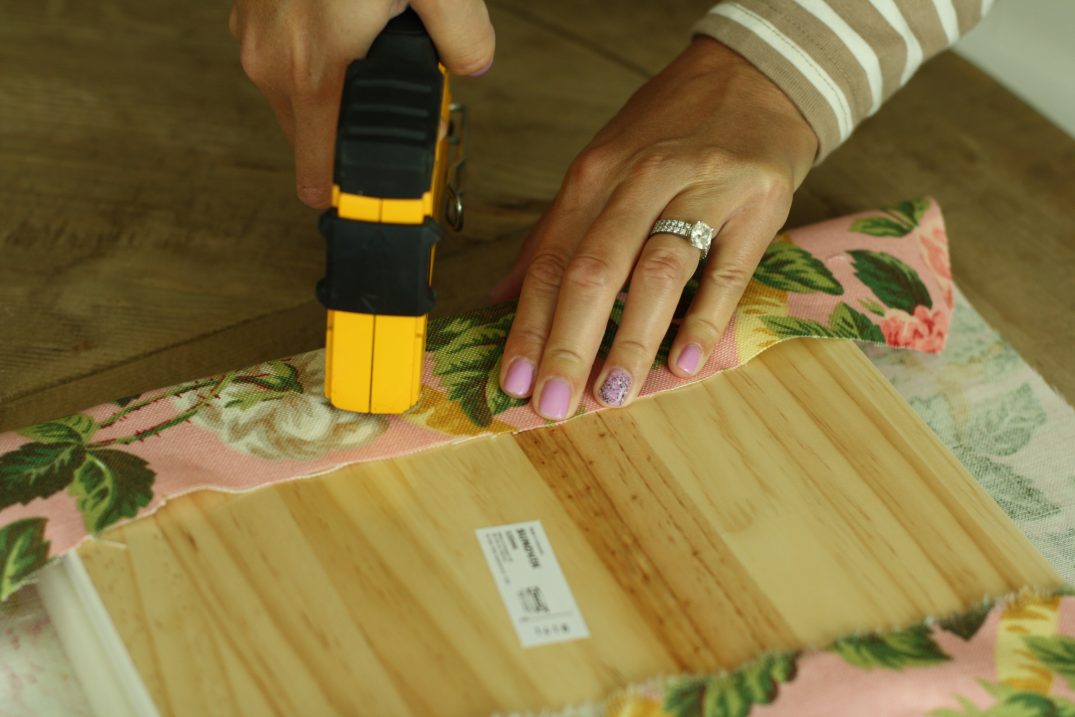
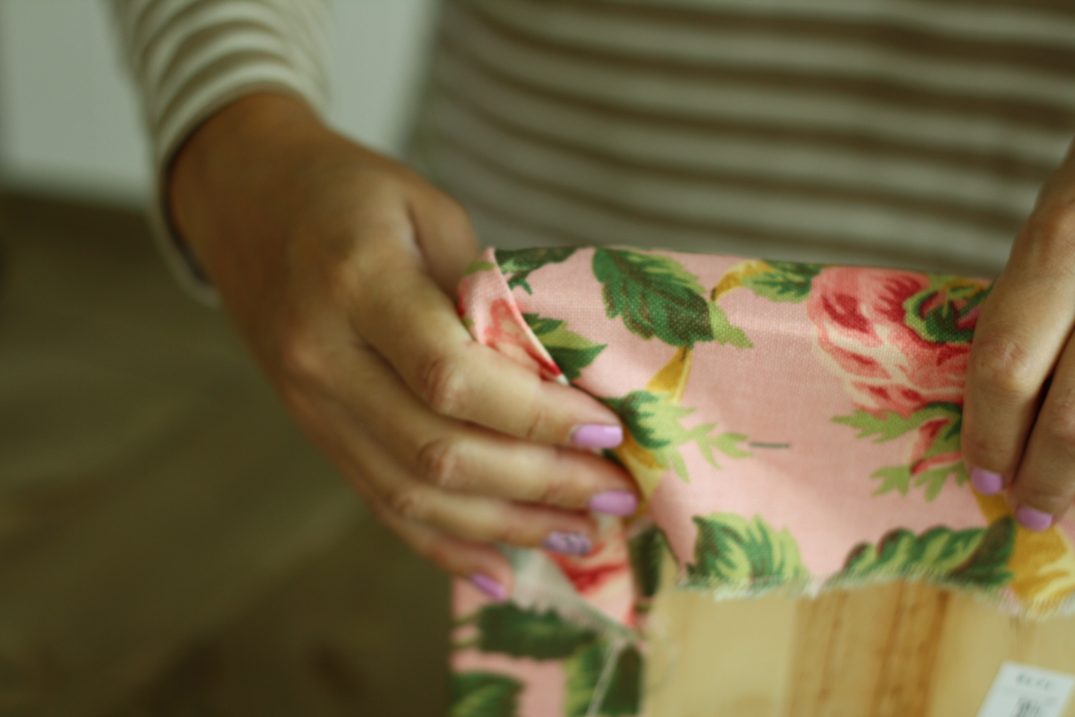
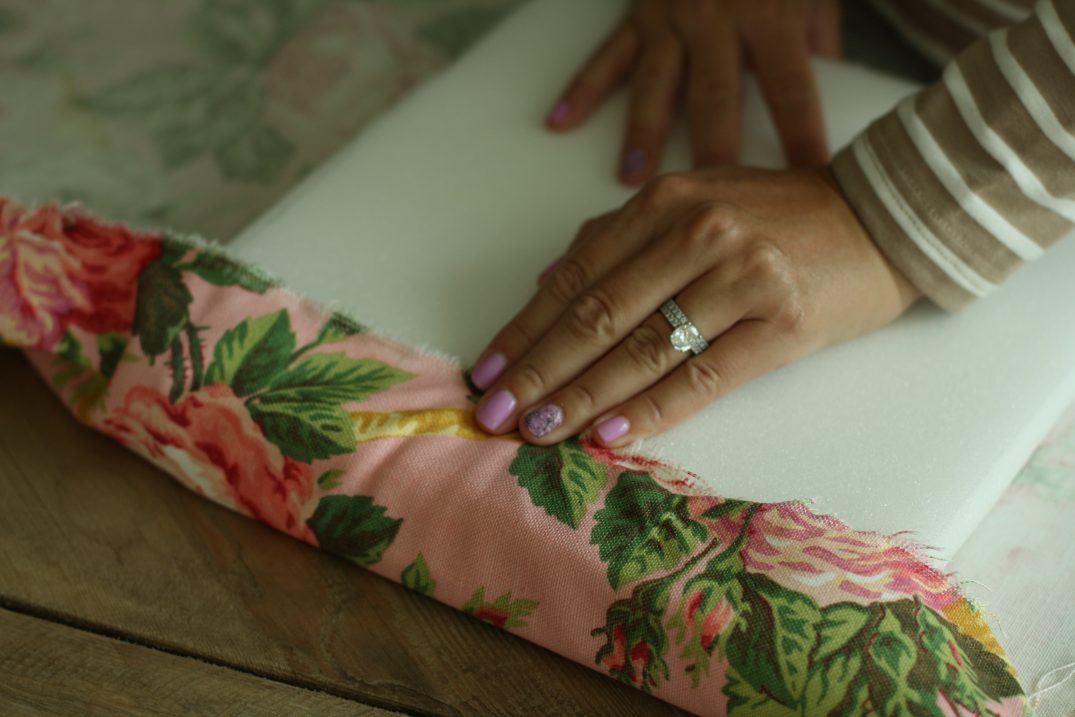 After that step, make sure that your piece of fabric will cover all sides of the chair piece and foam.
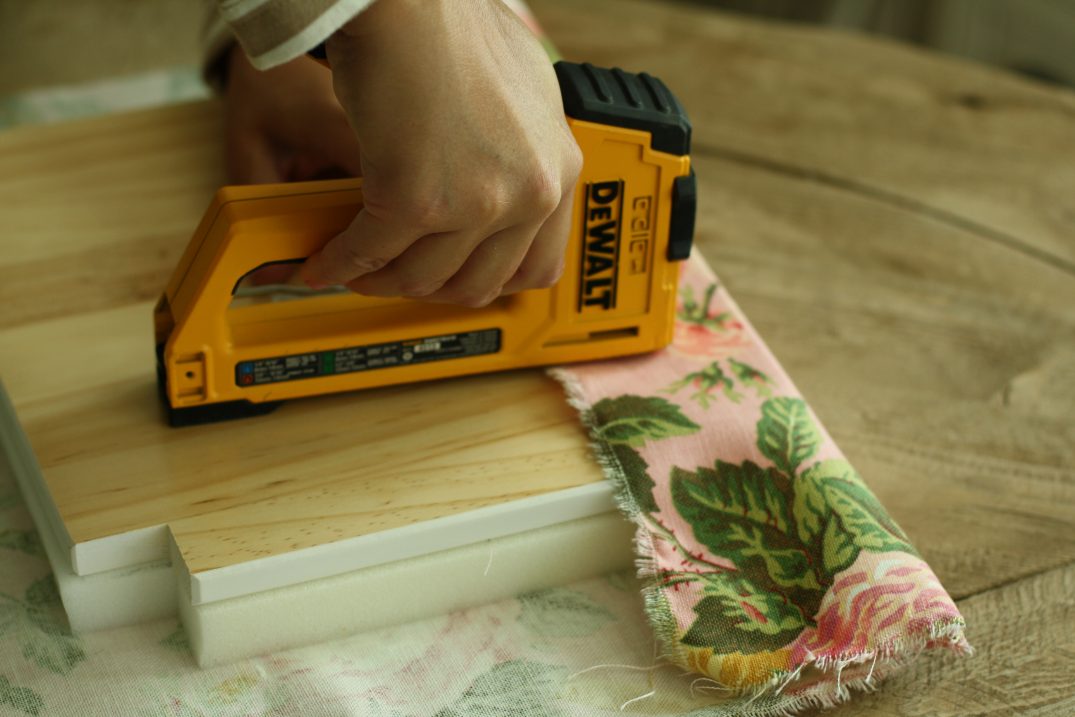
 Then, you start to staple each side of your fabric. I don’t do it in a organized fashion, at all. I just start stapling and hope for the best! Staple guns are tough to use! You need a lot of hand strength to push down on those babies!
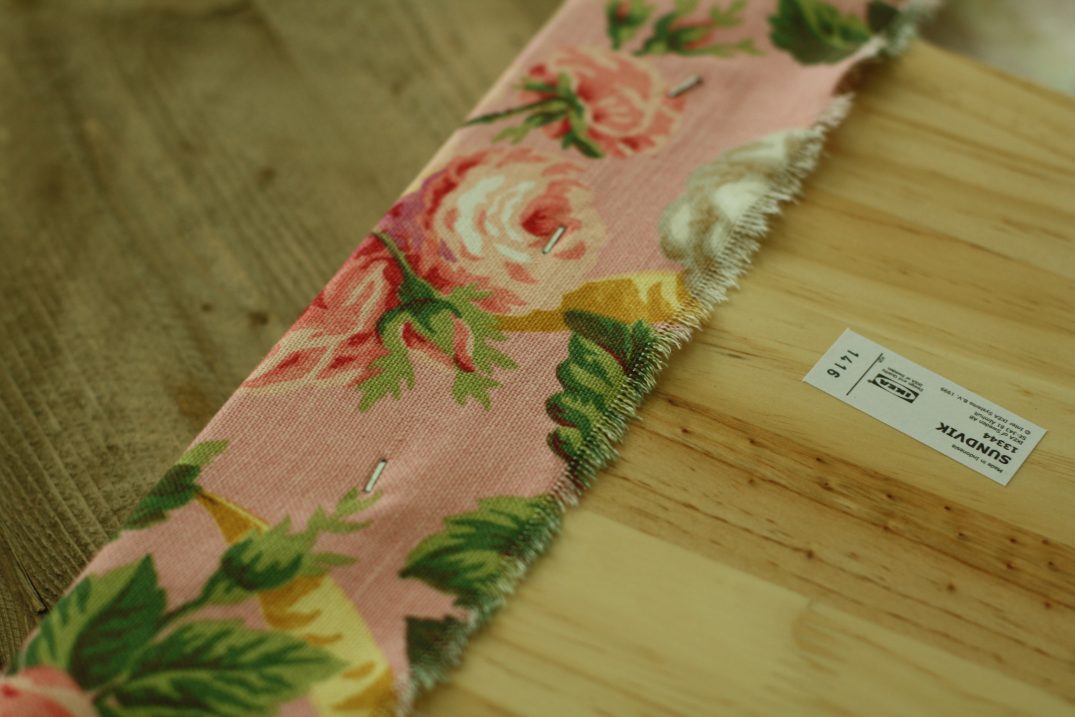
 Be sure to leave your corners open. They look like little wings…
 After you have stapled all four sides, your piece should look like this…your hand will probably be sore too!
 Then comes the corner folding time. This part can be frustrating. Mine aren’t perfect and I’m okay with that. Perfection is overrated.
 You want to take each wing and pull it out to the side…
 Then you want to fold it in, to the side and underneath the chair piece. You will probably have to mess with it a few times to get the fold small enough and to get rid of bumps, but by the 4th chair, you’ll be a pro. At least that is how I felt. I feel like I did the 4th chair in record time!
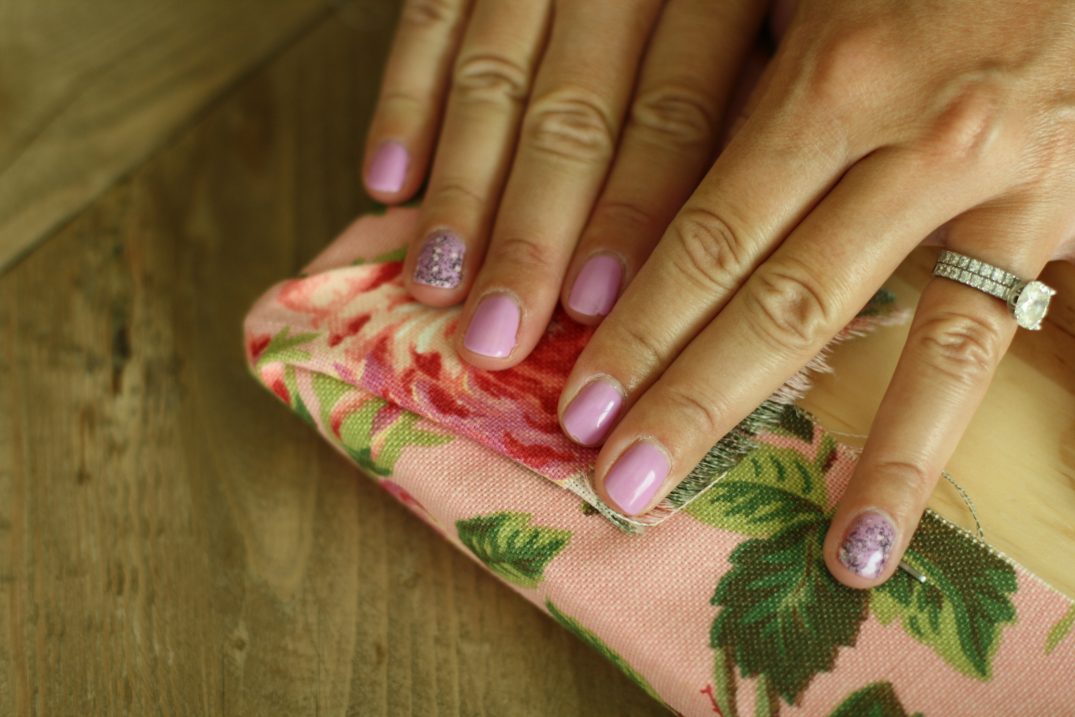 The bottom should look like this after you have folded the corner.
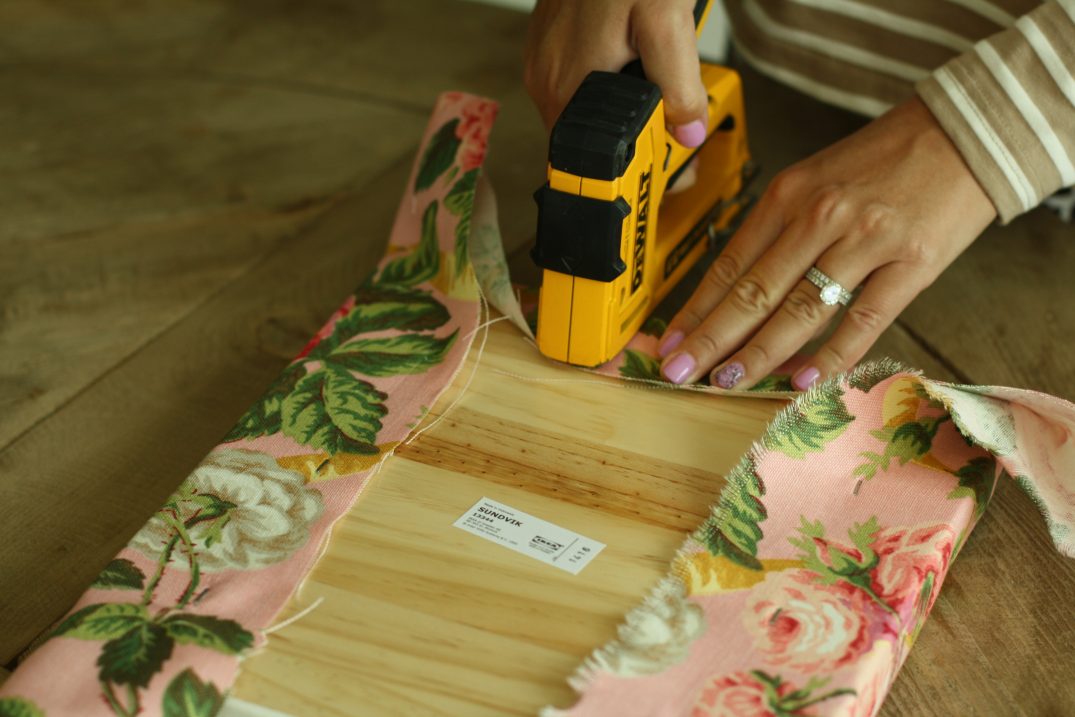
 Once, you are set, grab your staple gun and go to town…I clearly use too many staples, but it got the job done and my corners are snug!
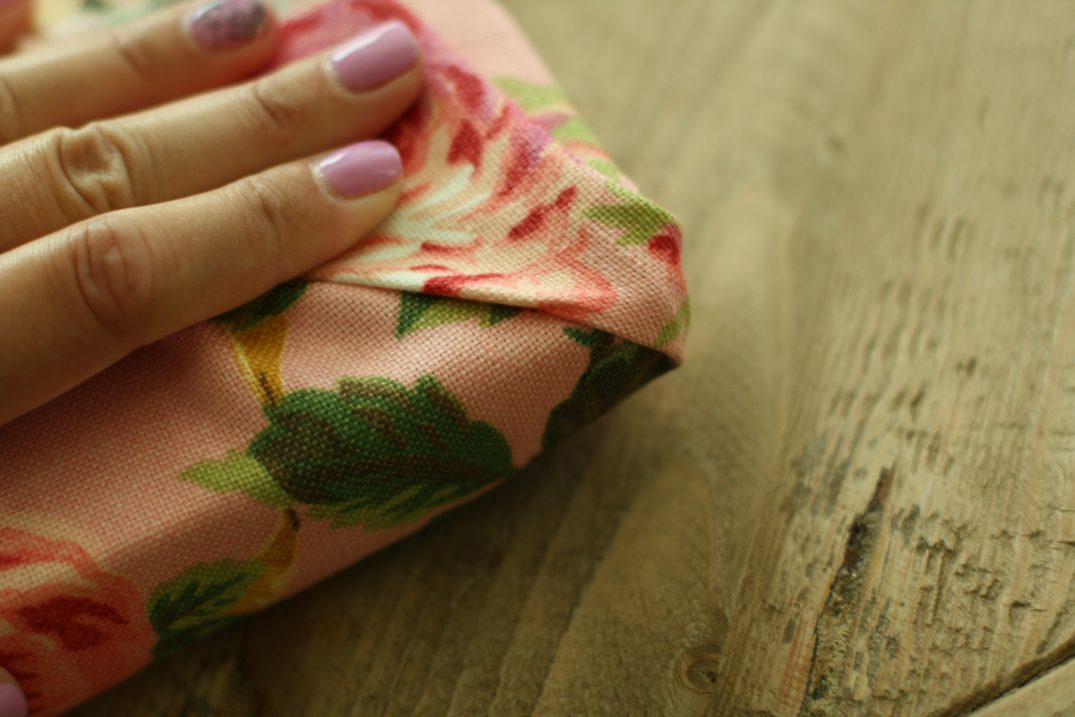
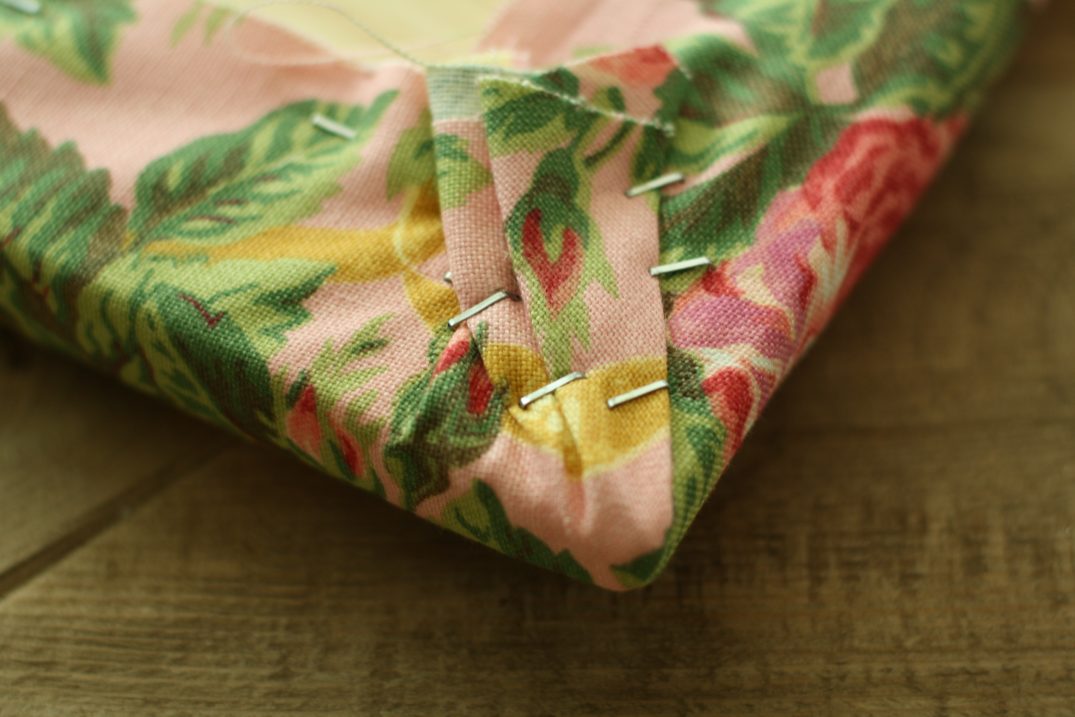 You’ll do this again to the other front corner.
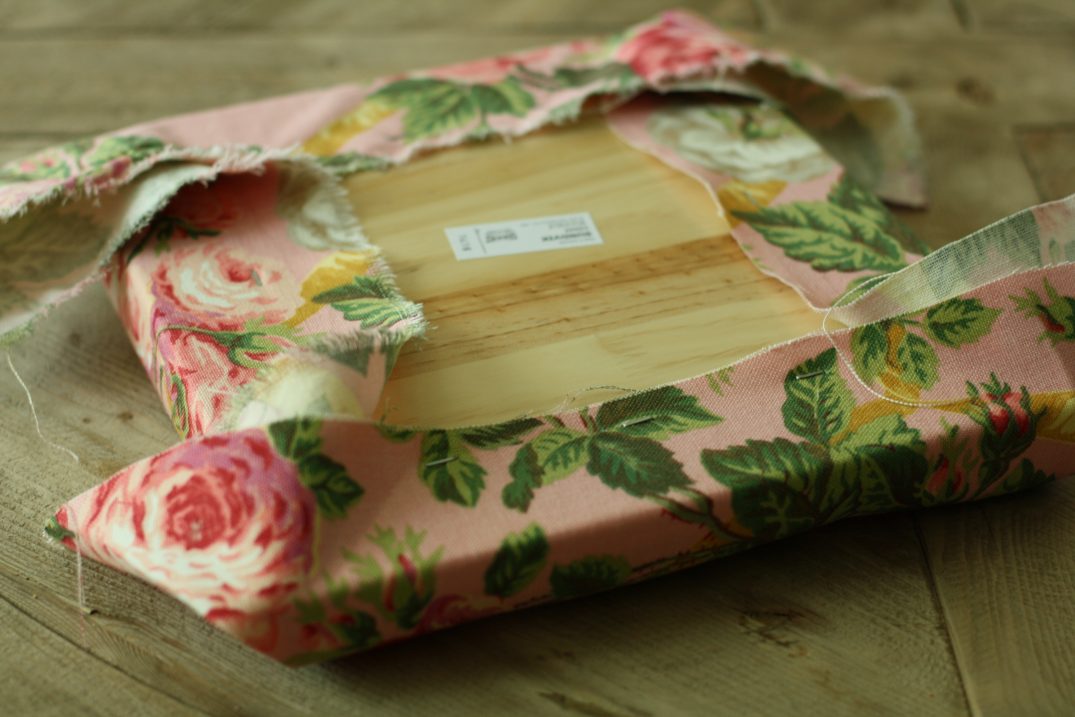
 Then you’ll be ready to start the back corners. Those are way easier.
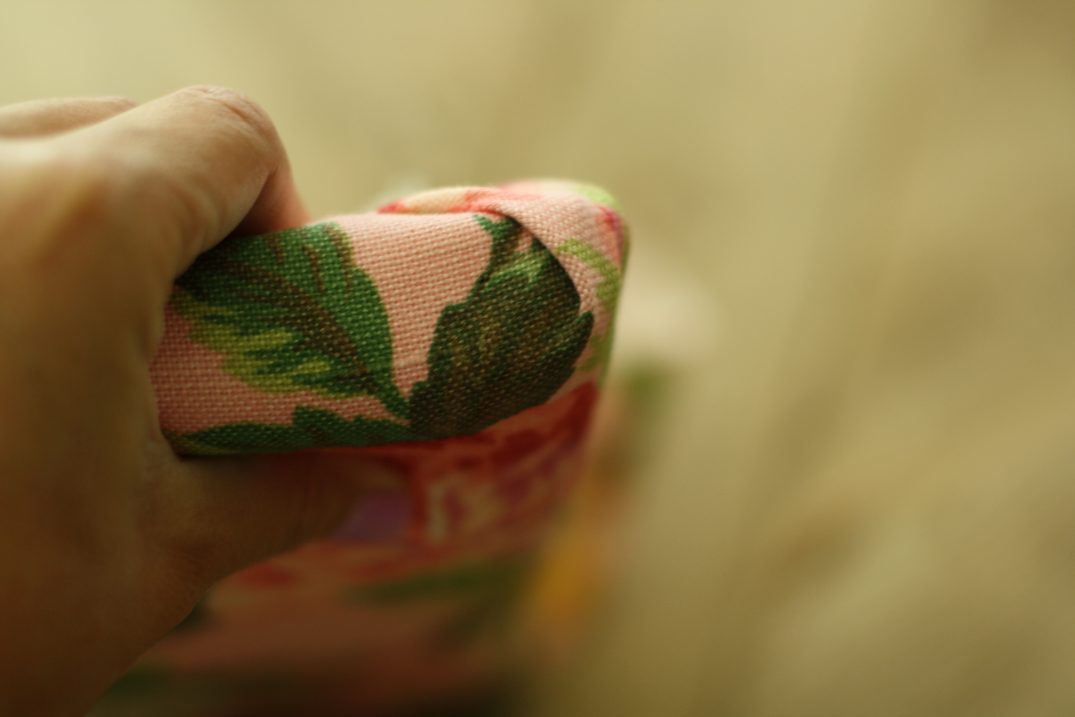
 All you need to do, is kind of shape the fabric into the little cut-outs.

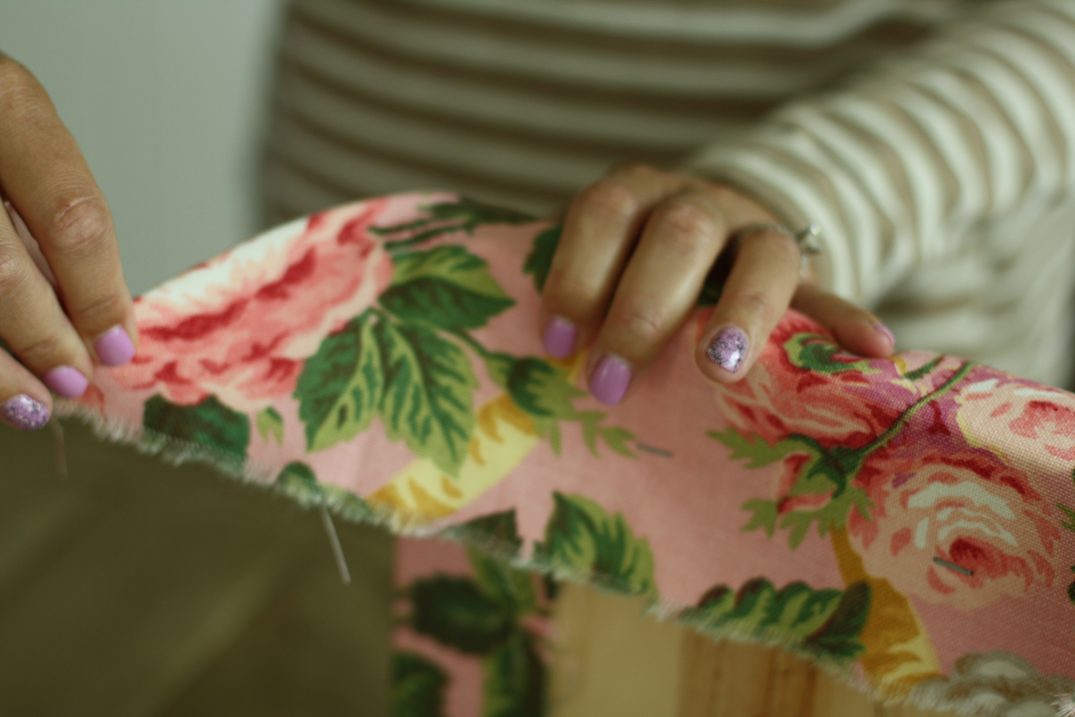
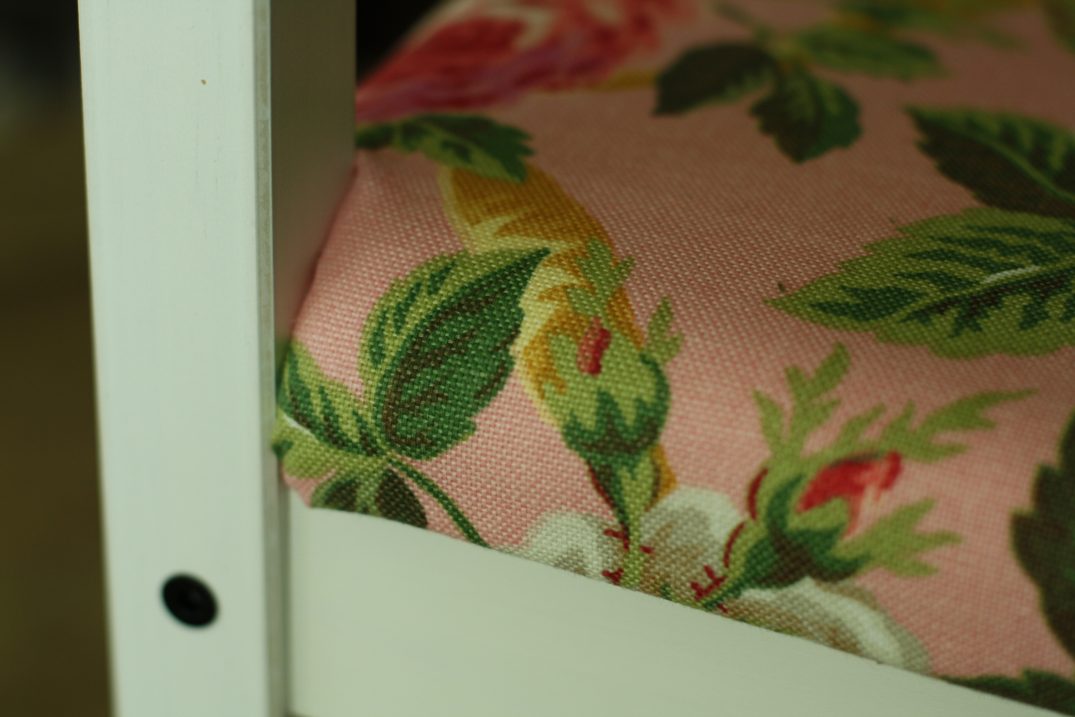
Then you’ll push the chair piece in to maneuver the fabric into place. You might need to pull the fabric from underneath a little as well…just to be sure there aren’t any wrinkles.
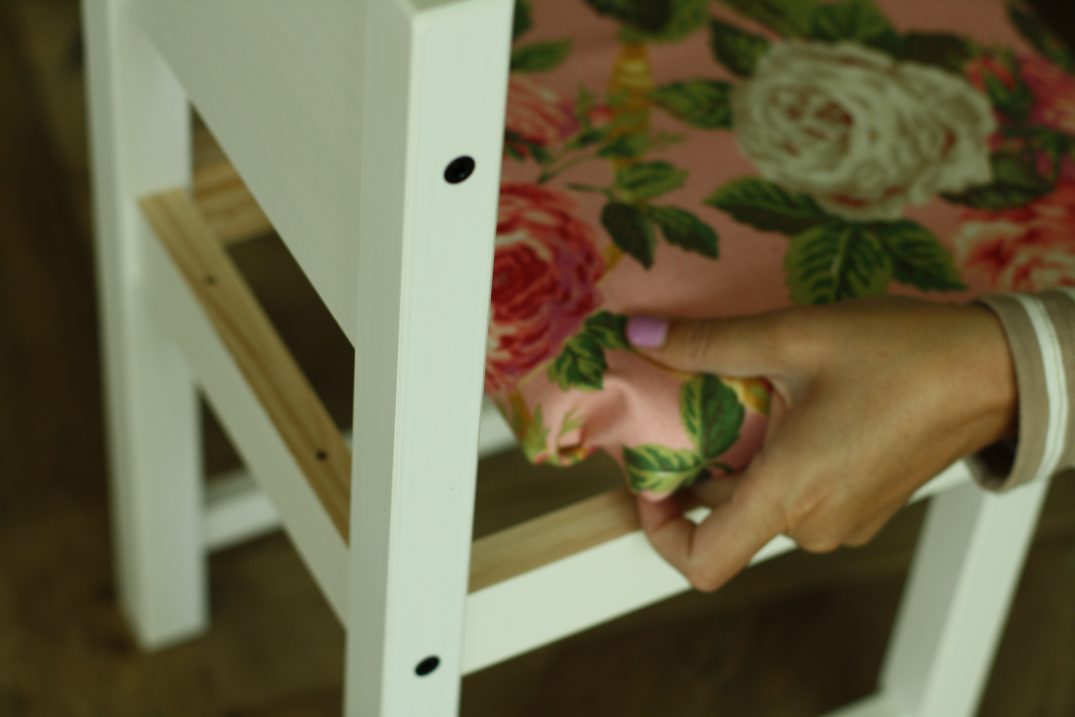
Now you are ready to complete the chair. Flip the chair over and place it on a table, like it shows on the instructions and staple the fabric in those last two corners, into place.
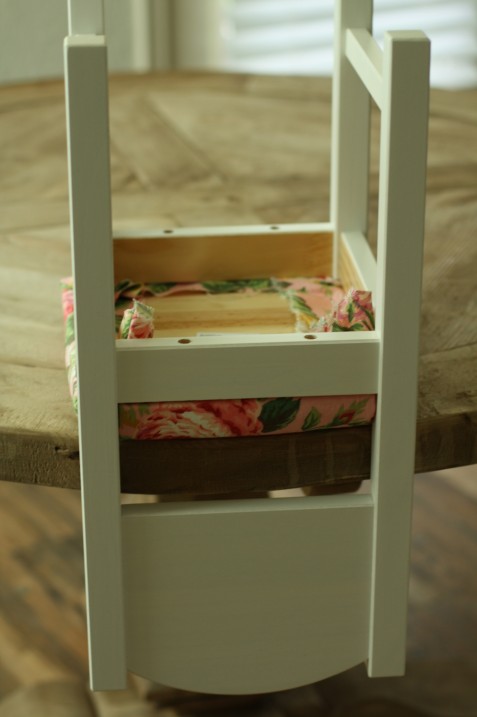
This where your longer screws will come in. This part gets tough…going through the wood and the fabric is hard. But, if I can do it, then you can do it!

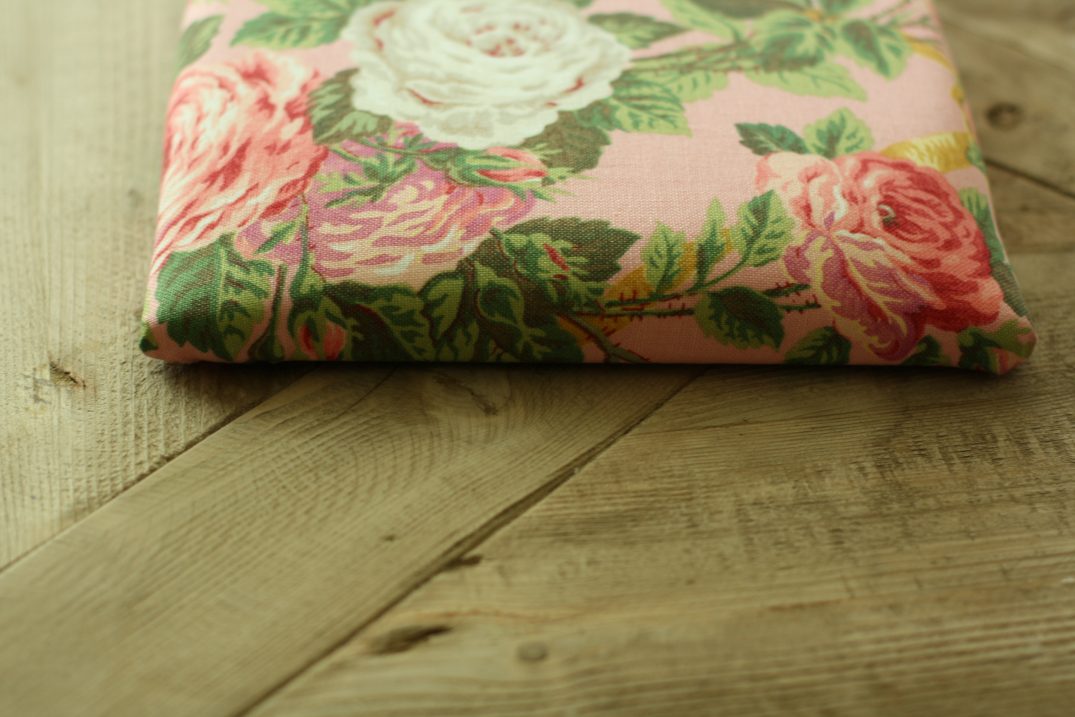
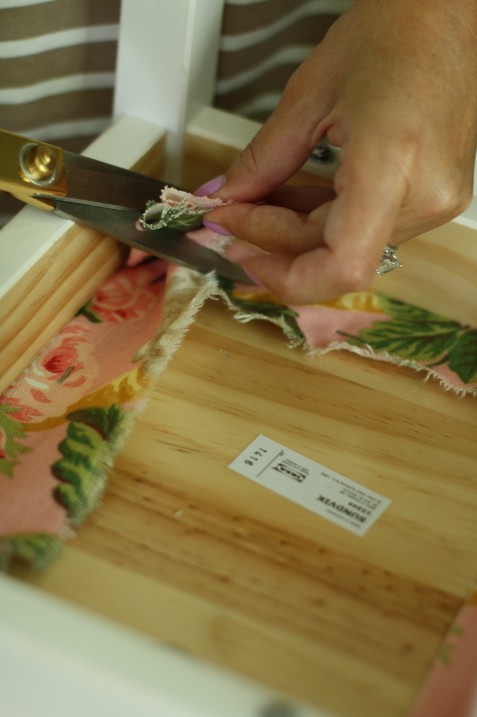
After you have screwed in all 4 screws/washers, you can cut any excess fabric that might be in the way…
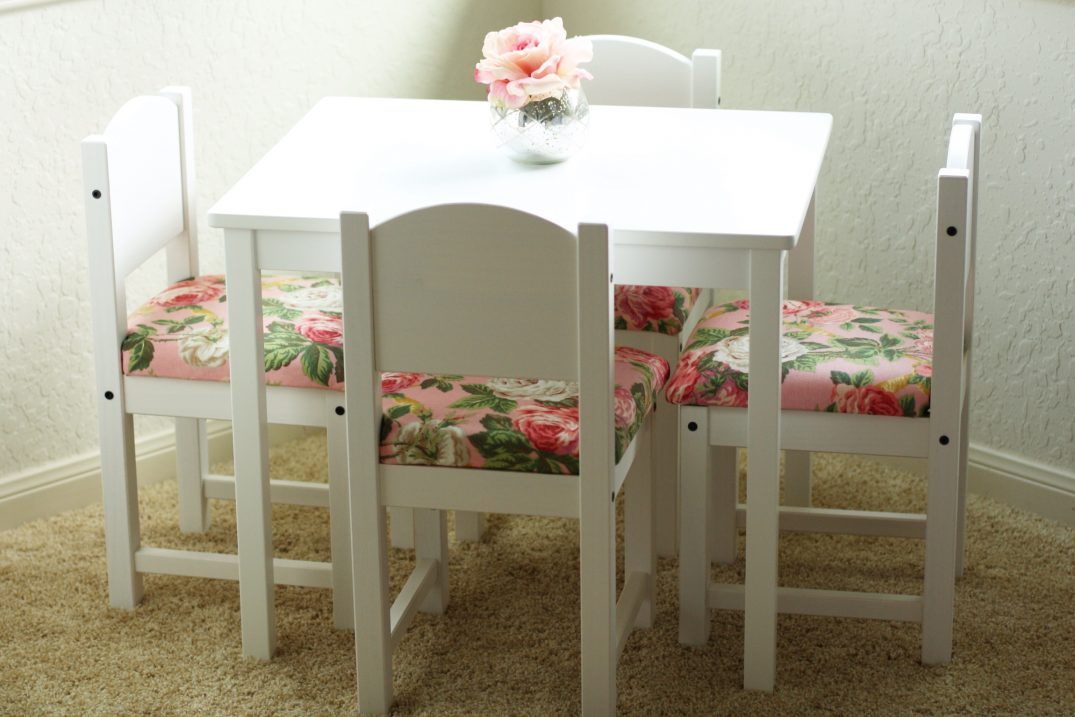
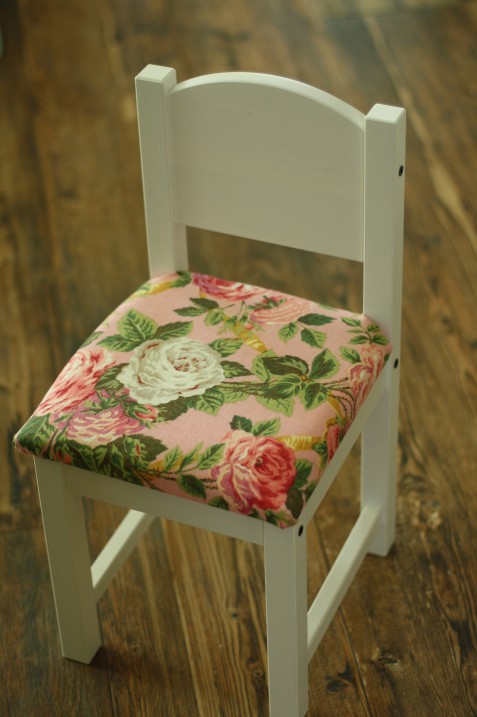
Then, you’re finished!!

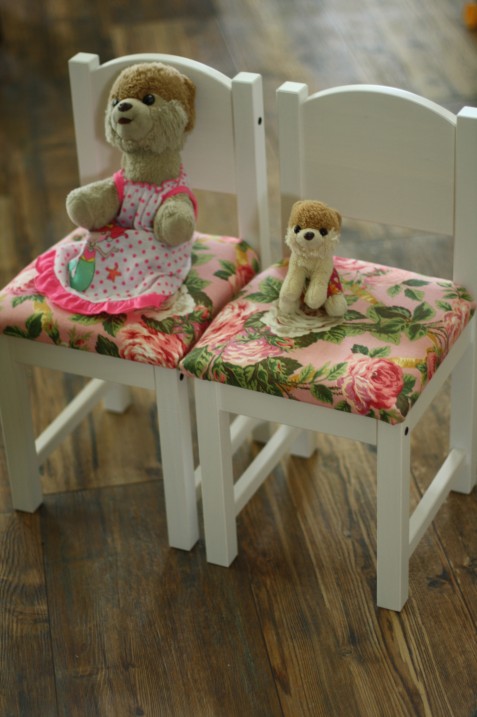
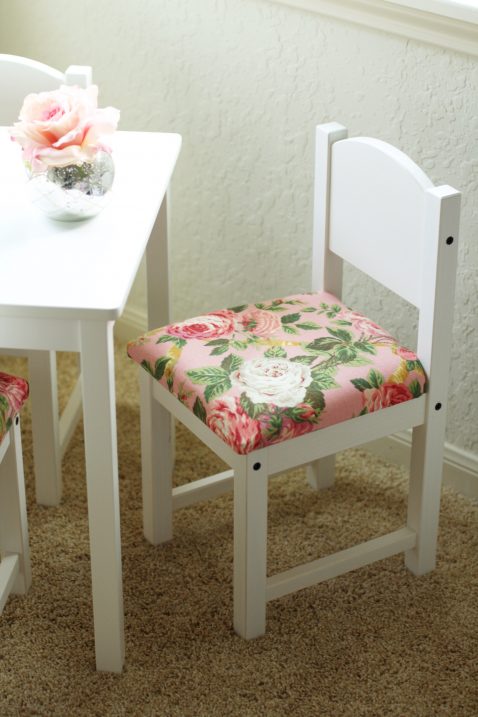
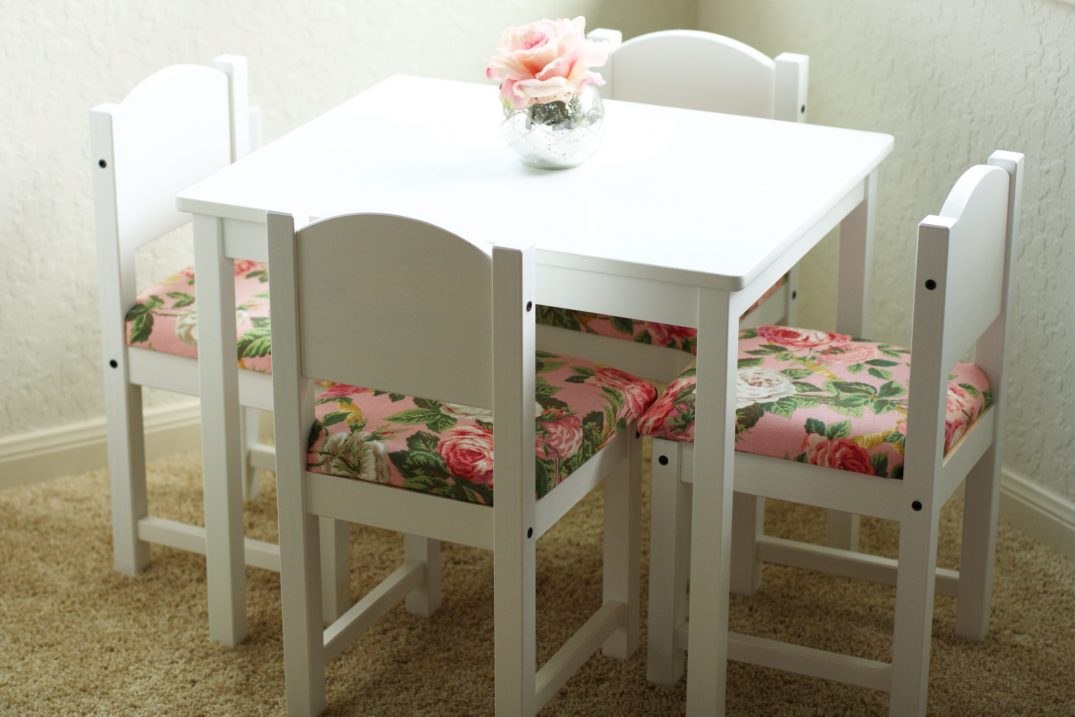
Give yourself a huge pat on the back or toss some confetti in the air, because you just made something that will look like this!
The Boos had to try out the chairs first. Reagan said they liked them.
I absolutely love this little area of her room. I think she is going to have so much fun with it.
I foresee lots of tea parties in Reagan’s future. I am so excited about this turned out!!! I love love love it!
What do you think? Are you going to make your own fancied up table and chairs?


What a great idea, I really wanted a table like this for our living room for Timothy, and I never thought of this, could totally use some nautical fabric and match everything! Yay! Thanks for the idea!
Yay Jennifer!! That will be so cute! xo!
LOVE!!!! It’s adorable Ash, I can imagine years it tea parties at this set.
Thank you Nancy! xo!
I love this! I have a little table and chair from Ikea sitting in a box in the basement. I hated how plain they looked so this is perfect! Thank you for the tutorial, your tutorials are the best! (I am an embossing champ now thanks to you and we make your energy bites every single week!)
Yay Kristin!!! Can’t wait to heart how your table turns out and I am so glad you are an embossing champ!! So fun!! Energy bites are the bomb.com! xo!
Wonderful idea and great execution!
I know she’s going to love it!
Thank you Haley! xo!
I looovvveee this for baby girl tea parties ! I wish I had more creativity that’s why I love your bloggy !
Thank you Britt! xo!
Love this ashley! So darling and I may have to copy in a slightly Manlier fabric for my little guy’s lego table! Thanks for the idea and LOVE the manicure too!
Irene
So fun!!! Love that idea! xo!
Where did you get your dishes from? I love the plate w/the onion bagel on it from instagram!
Hi Breda- Here are a couple similar sets-they don’t sell my exact one anymore. 🙁 http://bit.ly/1lENhvi and http://bit.ly/1nwVcKK and http://bit.ly/1kpD7mR
Love the fabric! Can you share where you got it from?
I love love love the fabric you used. Can you share where you got it from?
The fabric is Ralph Lauren…I am not sure the name. I’ve had it for awhile and a friend gave it to me. 🙂
I love this idea! Do you know how much fabric is needed?
Hi Marsha! I actually don’t. I was using scrap pieces of fabric from some pillows I made…so I didn’t measure them. I would get a yard or two of fabric just to be certain that you’ll have enough! xo!
Thank you! This is exactly what I was looking for in my daughter’s room. Super easy to do and it turned out great!